Setup a Schema
PlayMakers is not currently released for productive usage. The material below is a preview reference.
Please contact us to get started.
What is a contribution schema ?
A schema is a json-type file that we came up with so that a studio can list every component that they deem necessary to check a submission.
You may also want your schema to include some rules, namely a set of technical and artistic specifications wrapping up all the demands that a text, an image, or even a mesh file should have. This way, their contribution should be game-compliant. Among others, a rule can check whether the text is of a specific length, whether an image has a transparent background, ...
A rule can sometimes propose corrections, in the case where creators' assets/inputs didn't meet with its requirements. For example, the transparent background rule can remove the background from a submitted image if it has one. Among others, this newly created image can be found in the exported archive.
We implemented an interactive way to set up schemas, using Blocky Tools. By describing json content, these allow you to define samples of blocks and assemble them in regard of a certain logic.
Guide to set up your schema using PlayMakers Editor
Here you are, making your first steps on your Studio Dashboard, way to go! As you may want to set up schemas, you can follow this non-exhaustive guide to help you to do so.
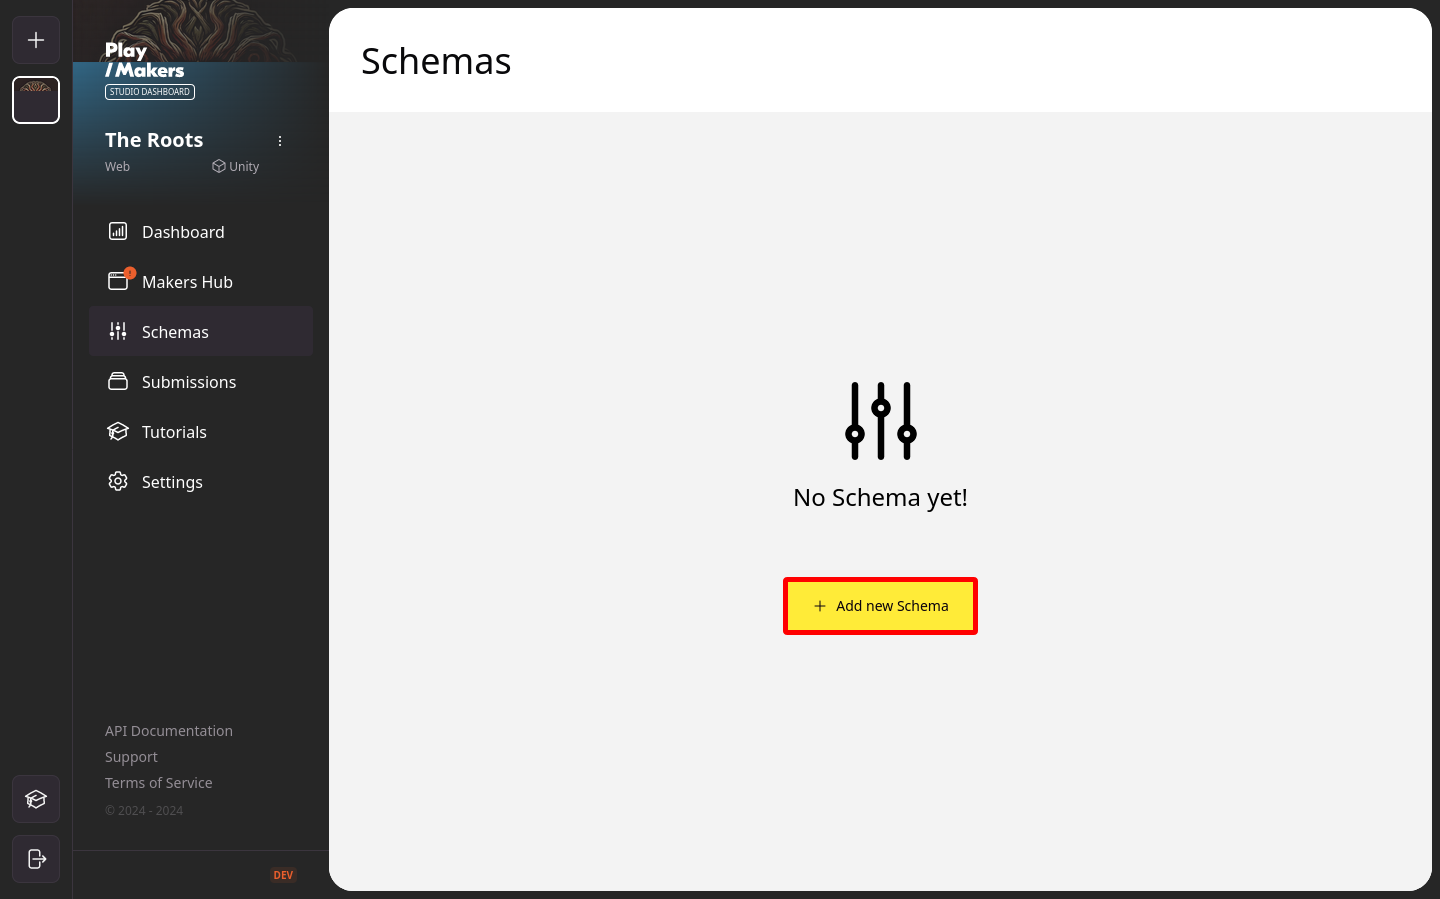
After clicking on the schemas tab, a default page, explaining what a rule is, is browsed for your first coming. Once you’ve read everything, you can select “Got it!”
Then, select “Add new schema”
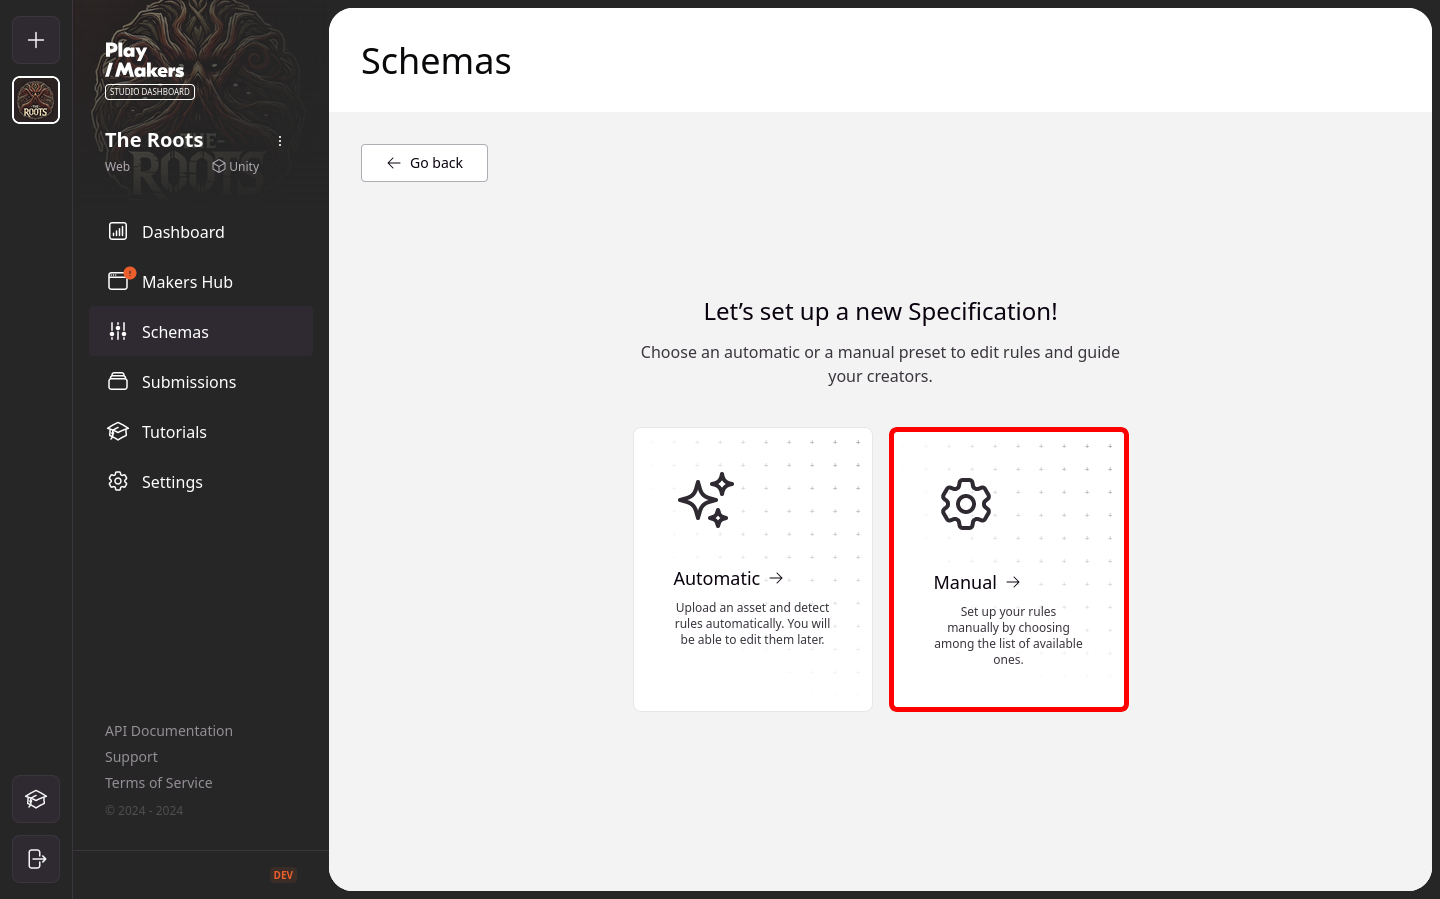
From now on, you have two possibilities.
Automatic setup
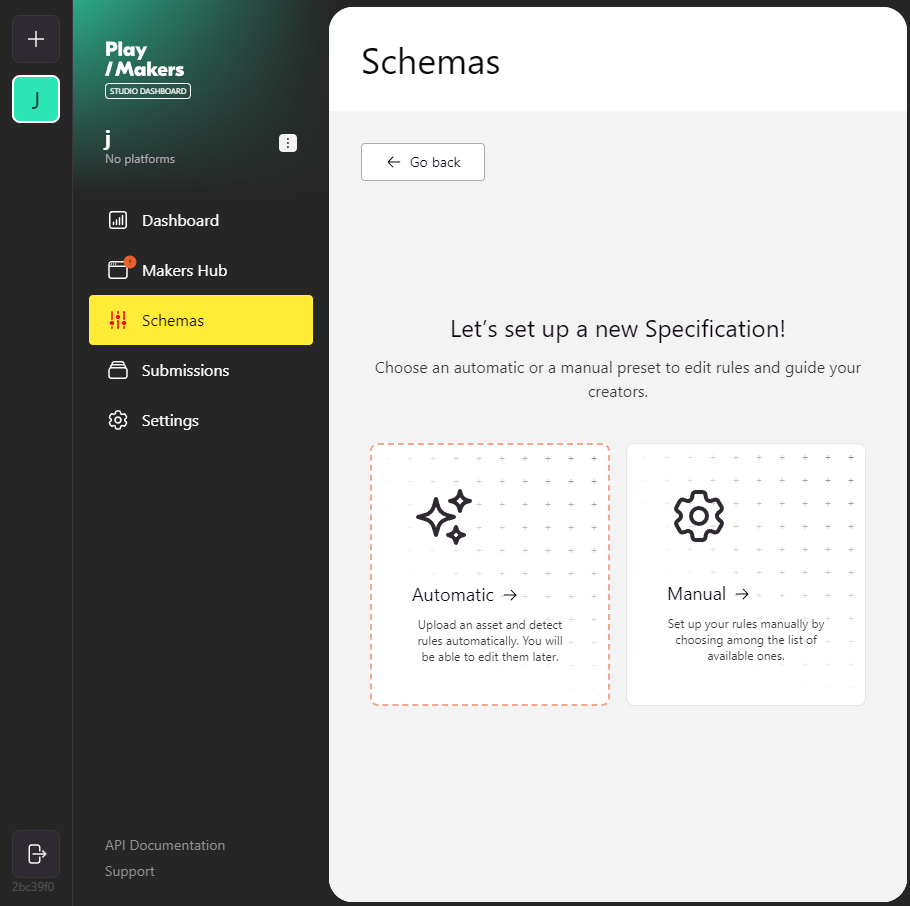
Manual setup
Another possibility, where you don't have to provide any content, is to manually set up your schema. As a starting point, this will pop up a preset with our recommended rules for a given type. You can then add other rules on top that you deem relevant. This second possibility offers you more leverage over your demands and creativity.
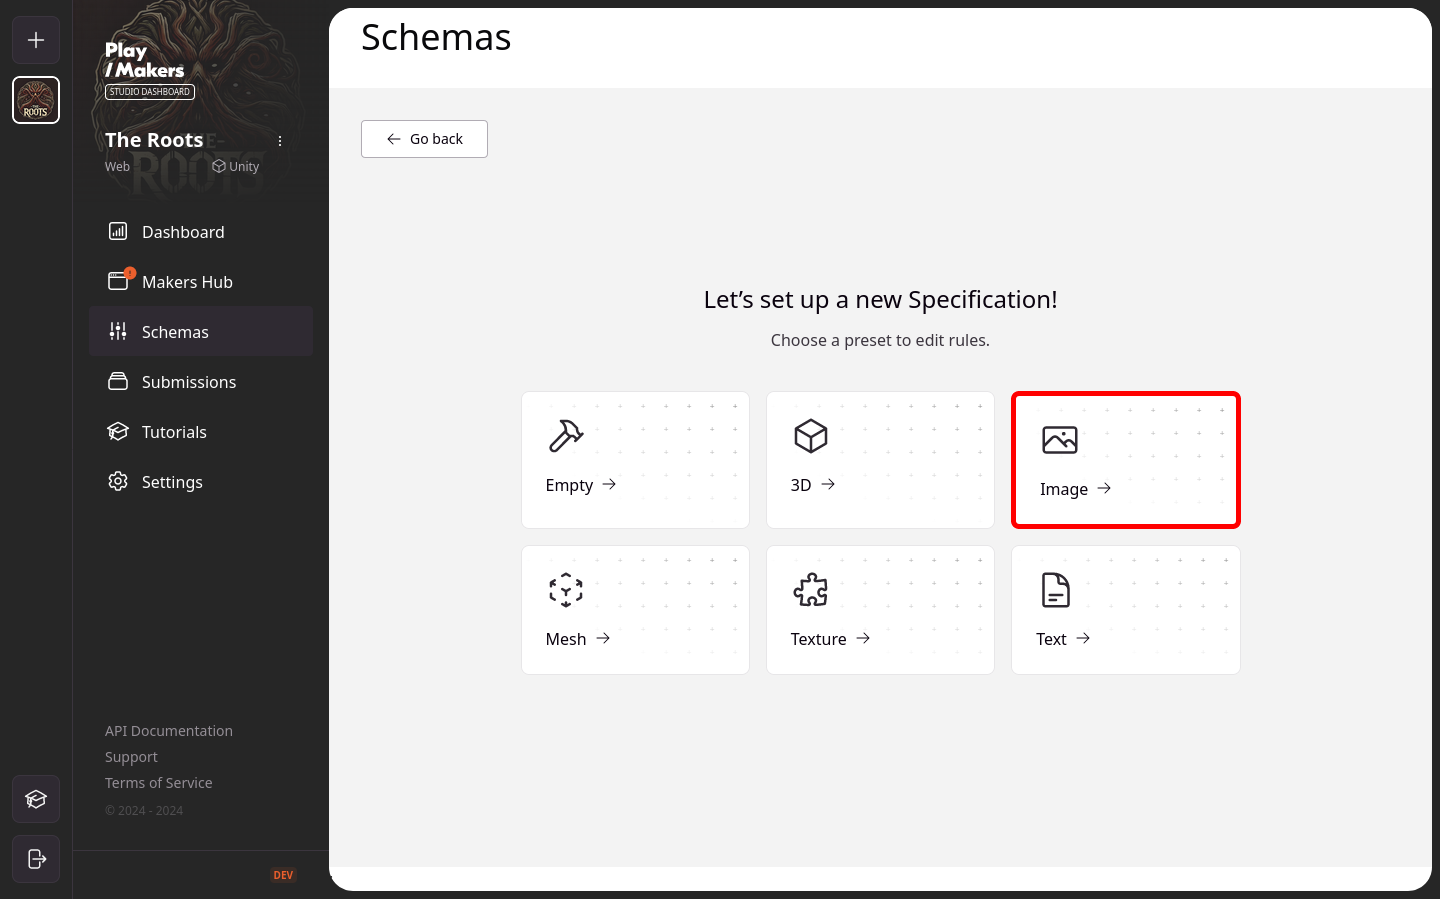
After choosing a manual setup, you will have a block of different types of schemas that you can start working on!
Note that selecting one type at this point doesn’t prevent you in any case from including other types of schemas in your work later. The option Empty allows you to build a schema from scratch. Let's select Image Preset as an example!
Starting New Schema Details
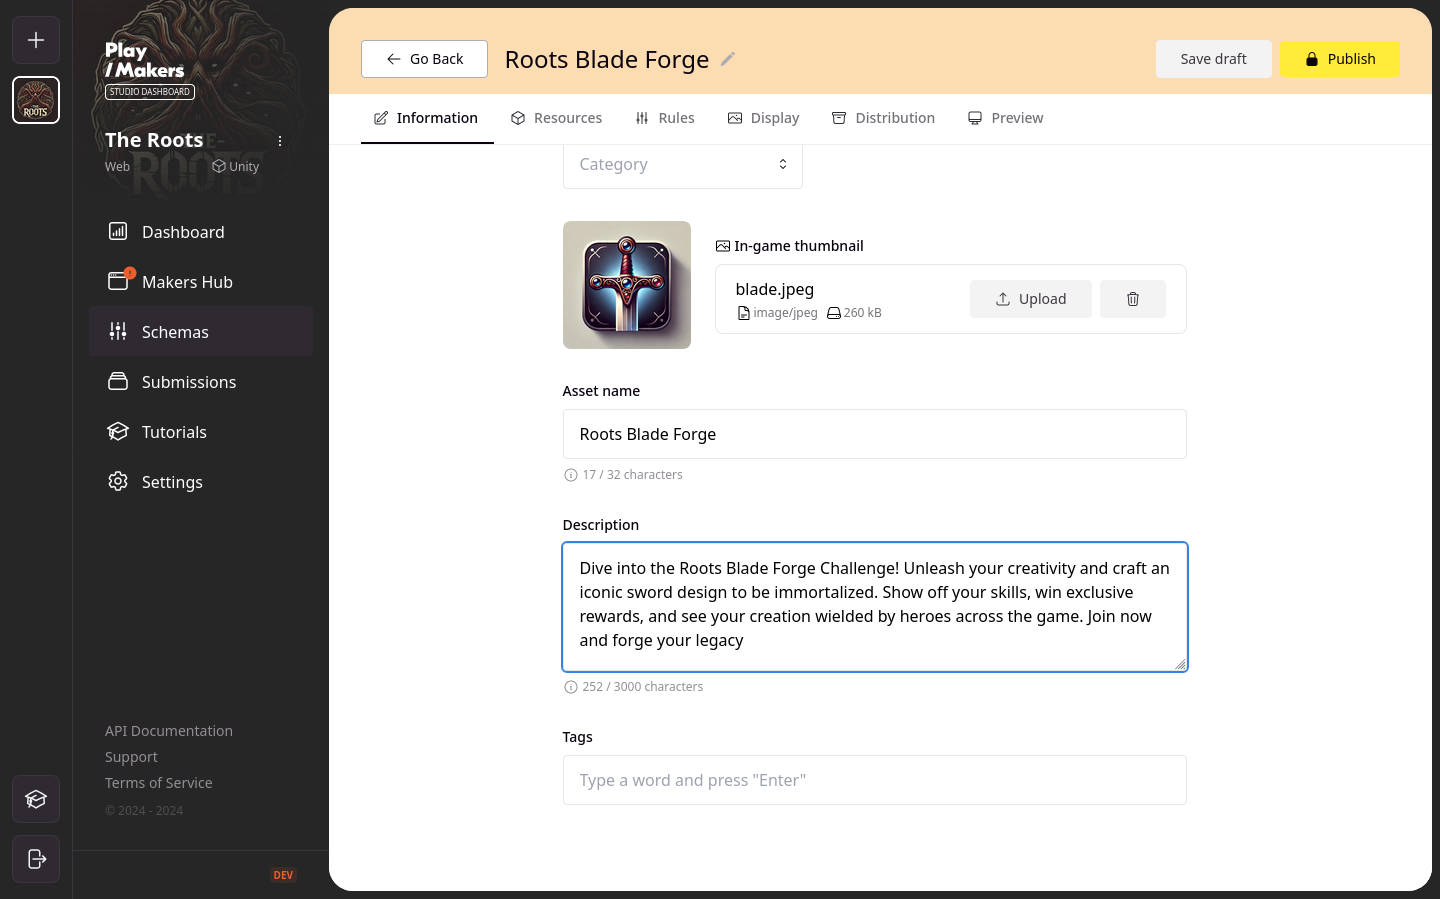
To start, fill in the schema information such as Name, Thumbnail, Category, Description, and Tags.
This information will help your creators understand your requirements and needs.
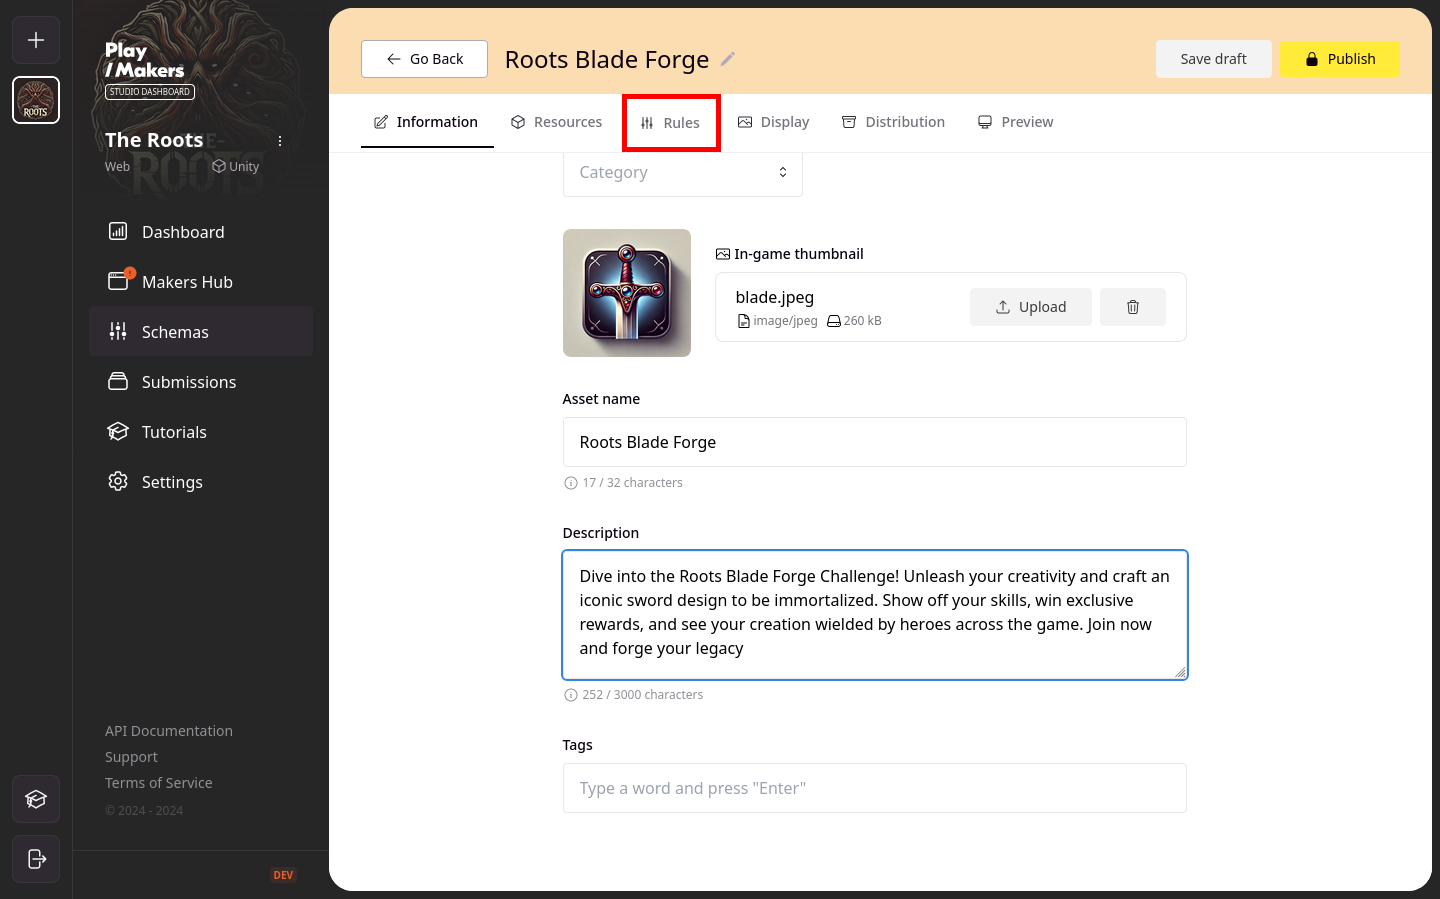
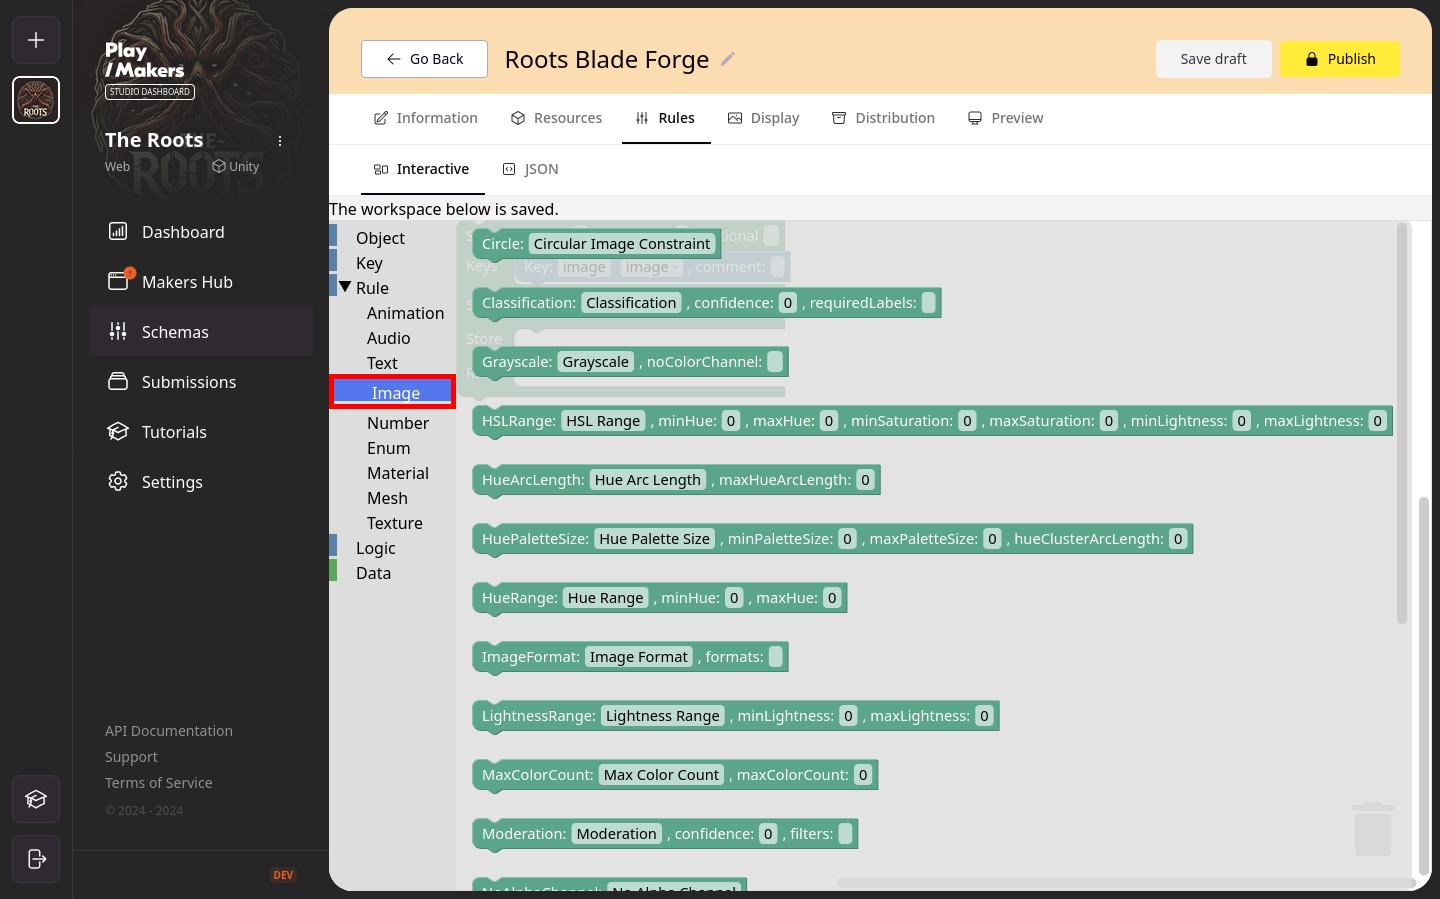
Once the schema information is filled out, head to the Rules tab. Here, you can use the PlayMakers Editor to set up a schema by dragging and dropping the rules you want creators to follow. Let's dive into the details of the rules tab.
On the left, you'll see a tooltip listing all the required elements to build your schema. The Object tab contains specific pre-built schema blocks. If you’ve selected the Image Preset, the SchemaImage block will already be in your workspace.
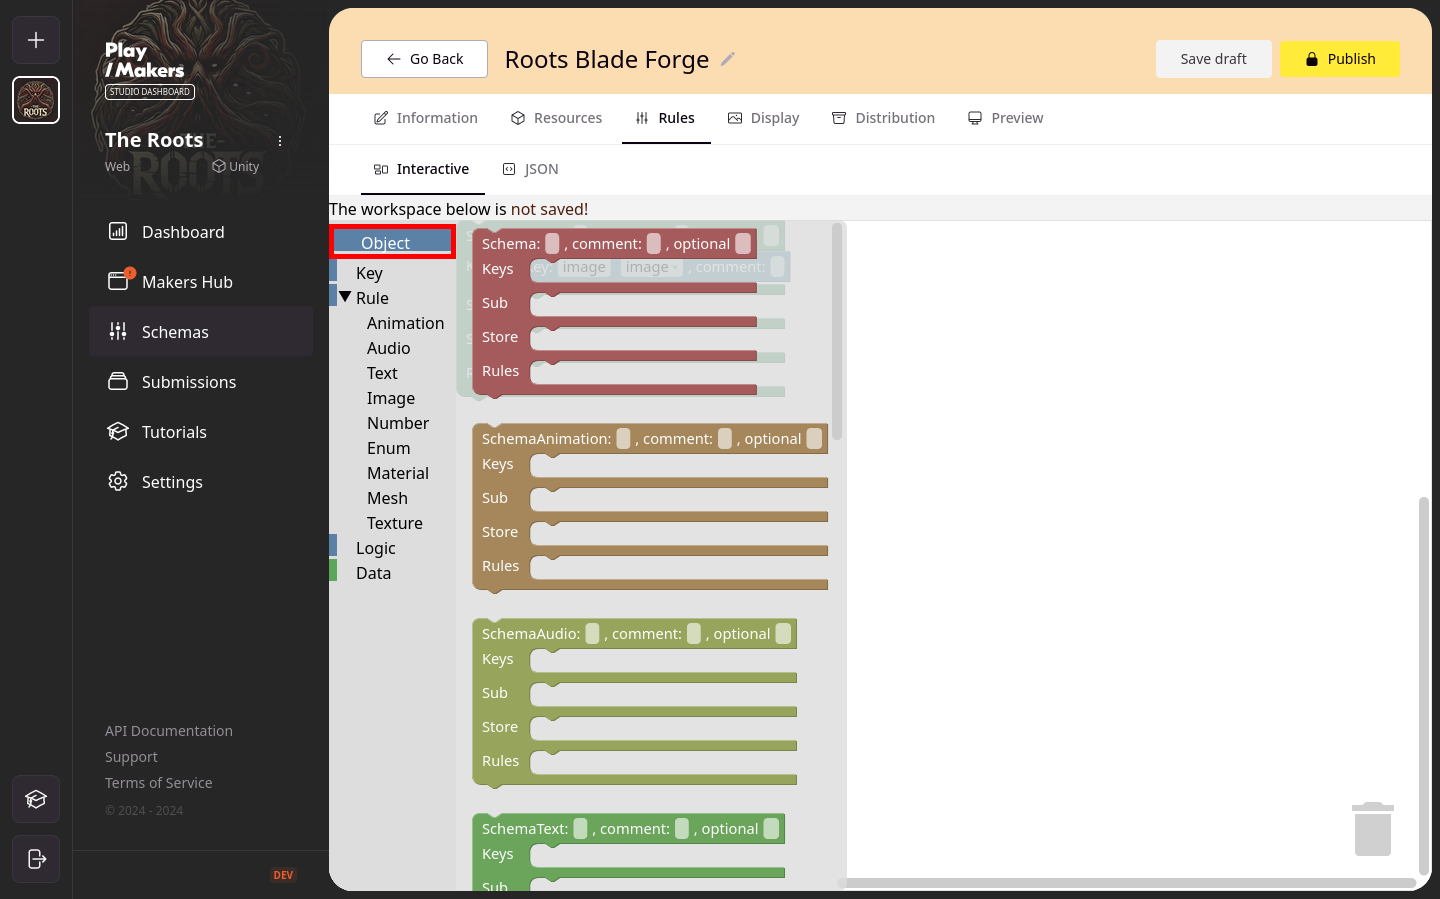
You can add several elements to an object:
- a label, which is the name you wish to give to the object
- a comment, explaining the purpose of the object for example
- a crossed box to make the object optional
- keys, that expect an input from the user (text, image, number,...). A key takes as entries:
- a name
- their type
- an optional comment, describing the purpose of the key for example
- other schemas in the section Sub, that are then called subschemas or children.
- rules :
- in the section Store that can be used to create dependencies with a parent. Such rules can be called outside their child object by reference
- in the section Rules. Such rules can only be called within their object
You can throw out any schema block either by dragging it to the dustbin located at the bottom-right of the workspace and then dropping it or by pressing DEL on the keyboard.
Applying Rules to Your Schema
If you want your schema to enforce specific rule(s) for contributions, go to the Rule tab and choose the rule(s) you wish to apply. Simply drag the rule to the appropriate part of the schema block and drop it. For instance, since we have a SchemaImage block, we can choose a matching key, such as Image.
If you only need one image key (i.e., creators only submit one image), there's no need to add more keys, as one is already included in the SchemaImage definition. However, if you're expecting multiple images, you can add more keys—just make sure each key has a unique name!
Example: Adding Rules for Image Format and Aspect Ratio
In our example, we expect to receive only one image from the users, so we have only one image key labeled 'image'. We’ve added two rules: one to check the image format and another to specify the aspect ratio (only square images in the mentioned formats can be accepted).
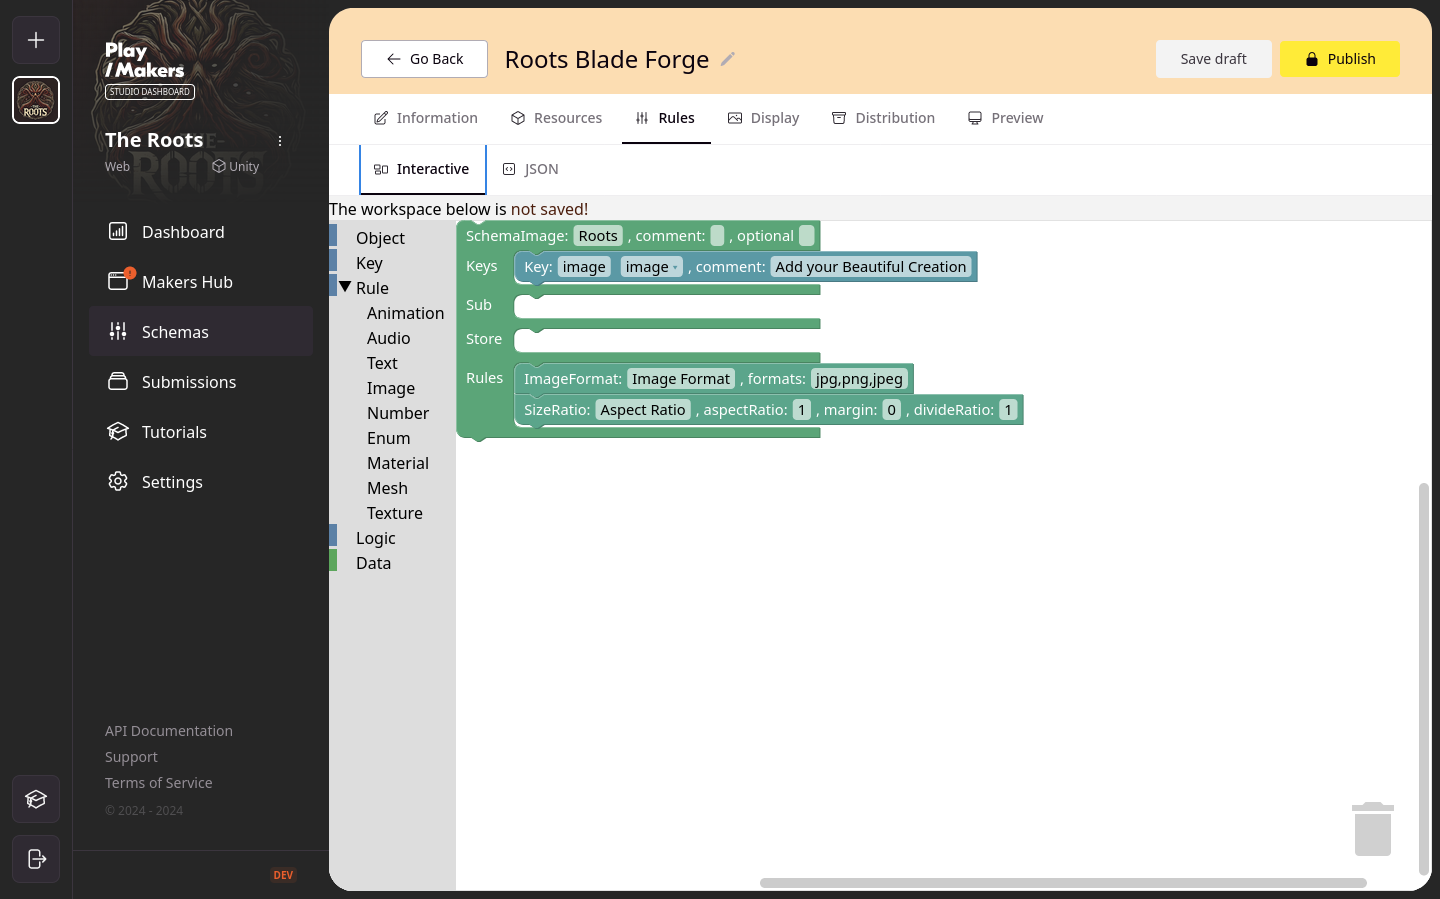
A rule of thumb is to always put a key, being predefined or not, (and the right one, corresponding to its schema type) so that you are sure that the schema block has indeed at least one key.
Be careful, as long as Studio Dashboard is not saying that your work is saved, switching tab will lose progress.
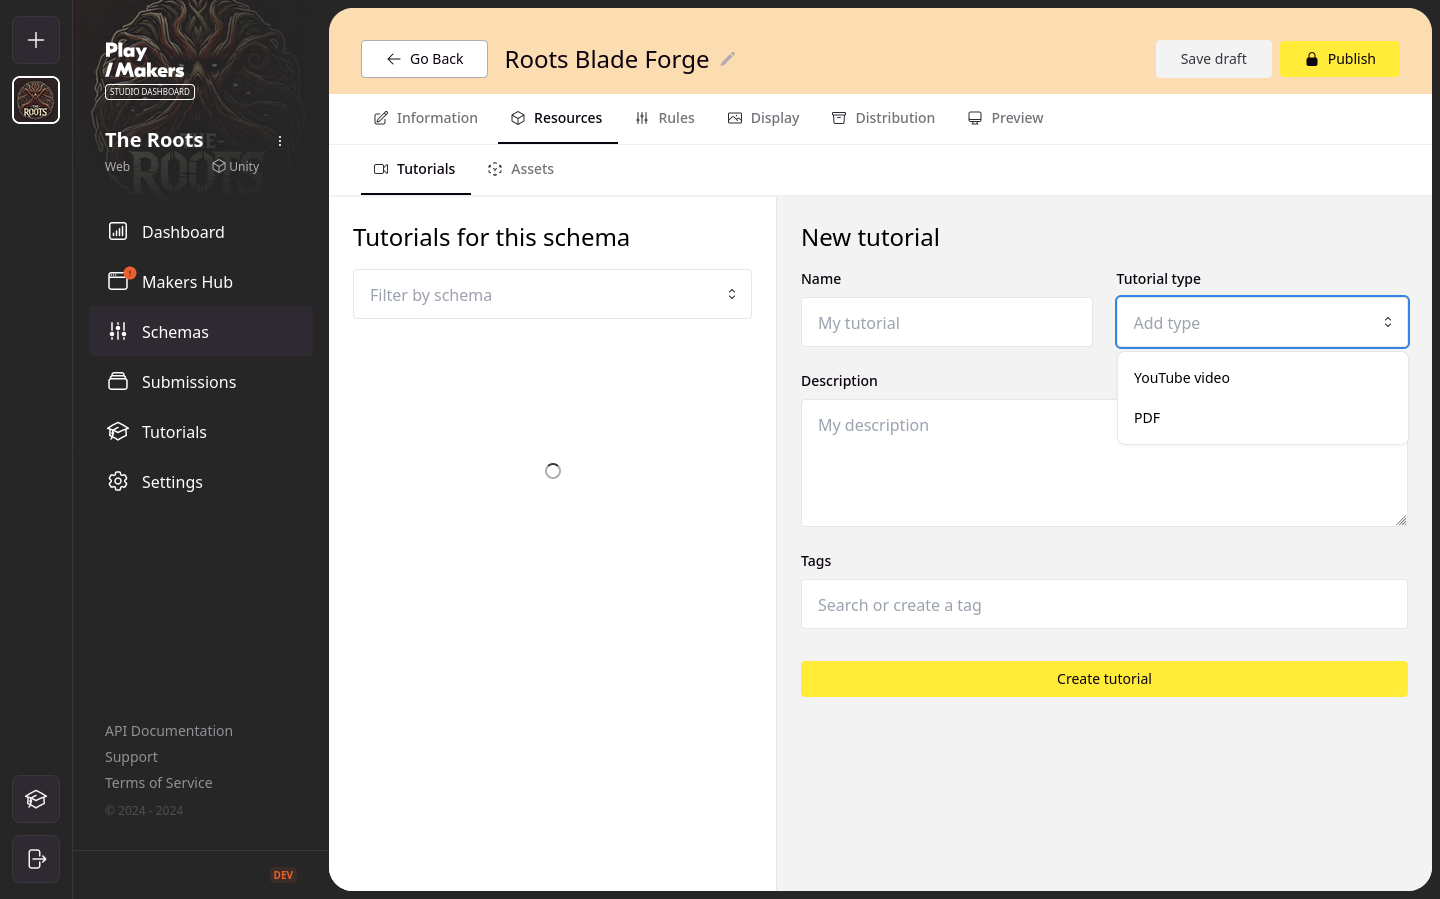
Adding Tutorials and Assets to Your Schema
To enhance your users' experience and guide them through their contributions, you can add both tutorials and assets to your schema. These resources will help users understand how to create and submit their own content while giving them the tools they need. Below is how you can manage these resources effectively.
1. Adding Tutorials
You can provide guidance by uploading your own tutorials or linking to public ones.
- Navigate to the Resources tab, located next to the Rules tab.
- There are two ways to add a tutorial:
- Upload a PDF: If you have a custom tutorial, you can upload a PDF file directly. This will allow your users to download and reference your instructions at any time.
- YouTube Video: Alternatively, you can link to a YouTube video tutorial. Simply enter the YouTube ID, along with a title and description that will be visible to your players. The thumbnail will be automatically generated from the video.
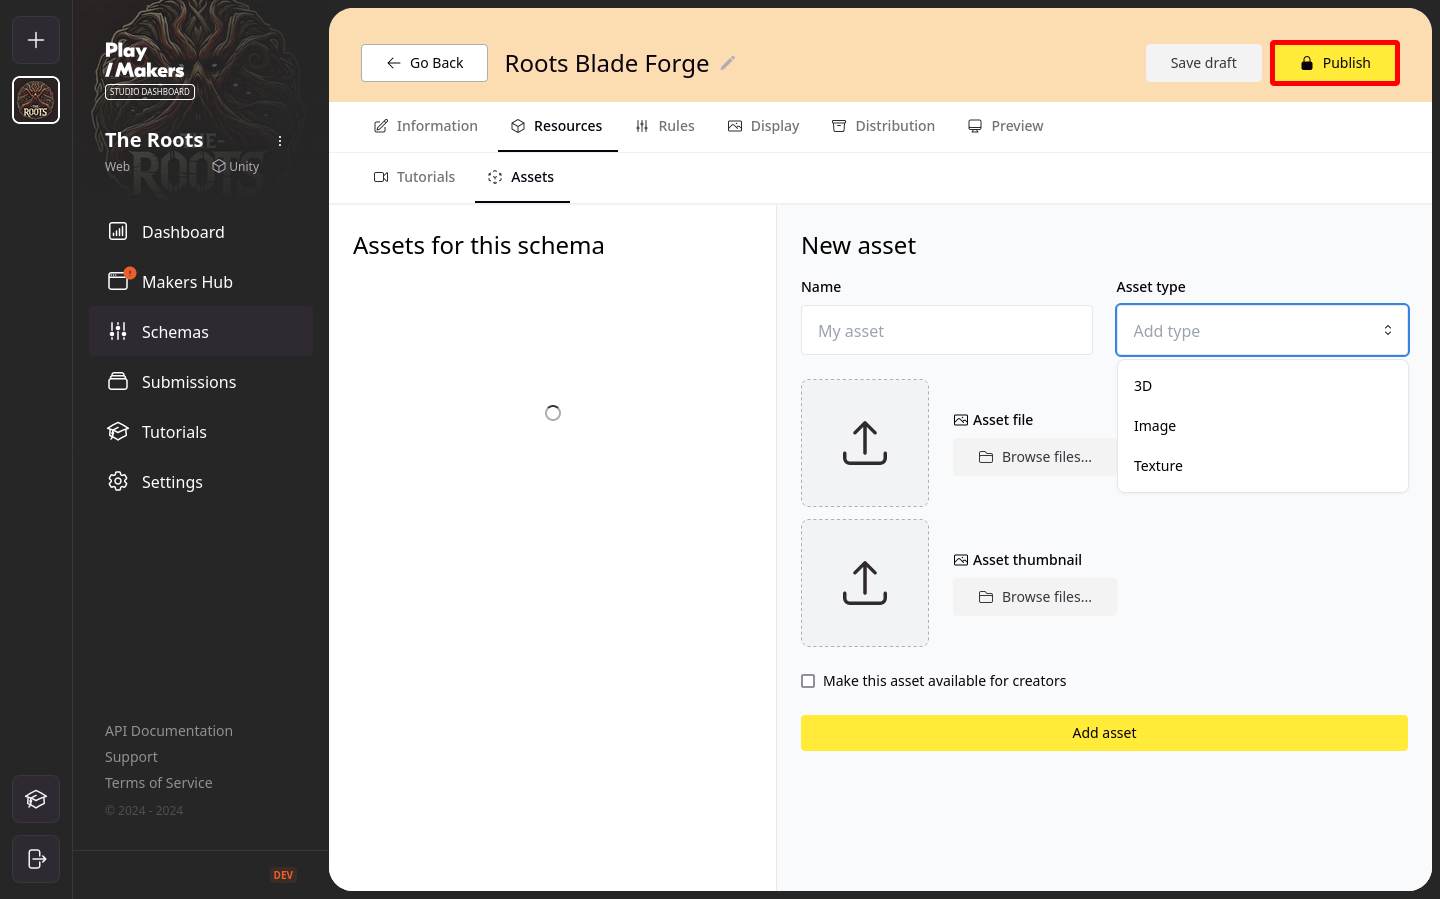
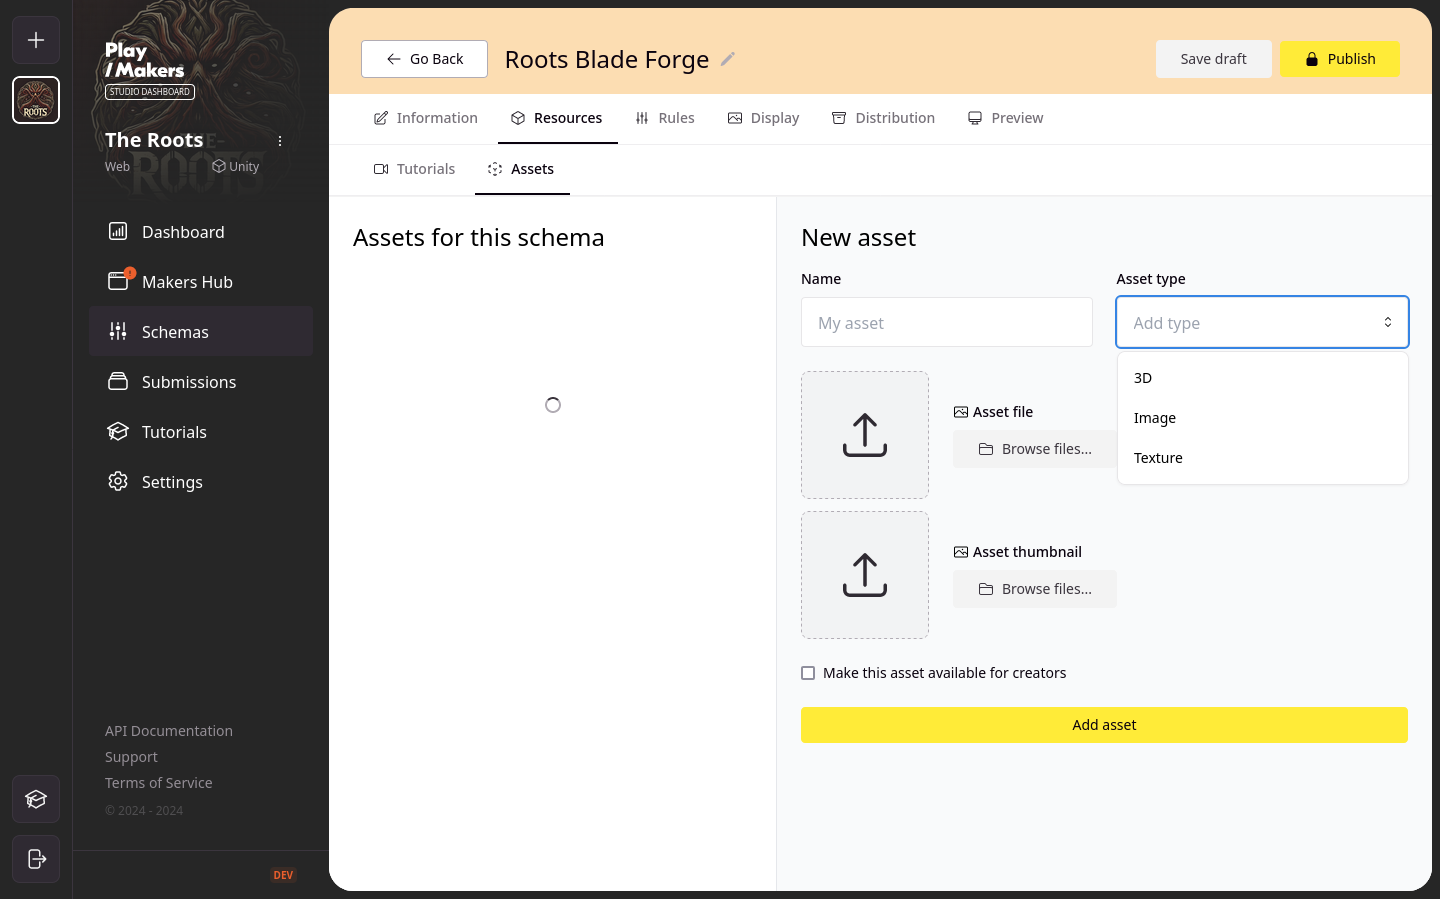
2. Adding Assets
In addition to tutorials, you can upload assets that your users can use as a base of their creations.
- Go to the Assets sub-tab, located next to the Tutorials.
- To add an asset:
- Asset Type: Specify the type of asset you're uploading.
- Thumbnail: Upload a thumbnail image to visually represent the asset.
- File: Upload the actual asset file that users will be able to download and use.
- To ensure that this asset is available for users to download and use in their contributions, enable the "Make this asset available for creators" button. This allows creators to directly integrate your assets into their submissions.
Finalizing and Publishing
Once you’ve completed your schema setup, remember to give it a name. It cannot be published without one. After naming it, press the Publish button to make it live on your deployed Makers Hub.