Managing Quests
In this section, we'll briefly show you how to add a quest.
➡️ For the full guide with all advanced options, check the
Quest Management page.
Creating a New Quest
To add a quest to your project:
1. Start a New Quest
Go to the Quests section in your Studio Dashboard and click on "Create New Quest".
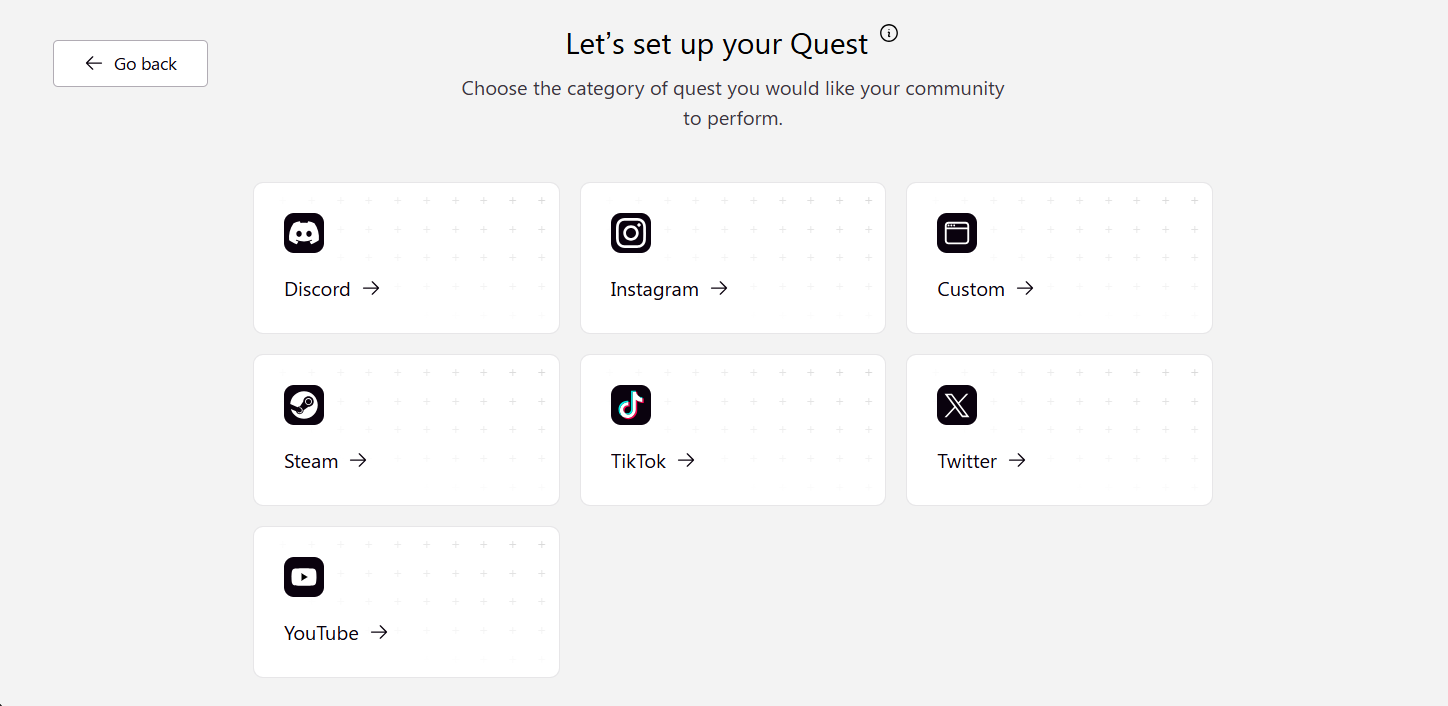
2. Choose the Provider or Category
Pick the platform or category that the quest is related to (e.g., Twitter, Discord, YouTube, Custom...).
3. Choose a Quest Type
Each provider has multiple Quest Types (for example: "Follow an account", "Watch a video", etc.).

➡️ Learn more about each Quest Type here
4. Fill in Basic Quest Info
- Quest Name
- Quest Description
- Points (how many points the user gets after completing the quest)
5. Add Quest Parameters
Depending on the Quest Type you chose, you’ll be asked to fill in specific parameters. Example:
- For a "Follow on Twitter" quest: Add the Twitter username.
- For a "Create a video" quest: Set the minimum number of views.
- For an in-game quest: Define the minimum hours played.
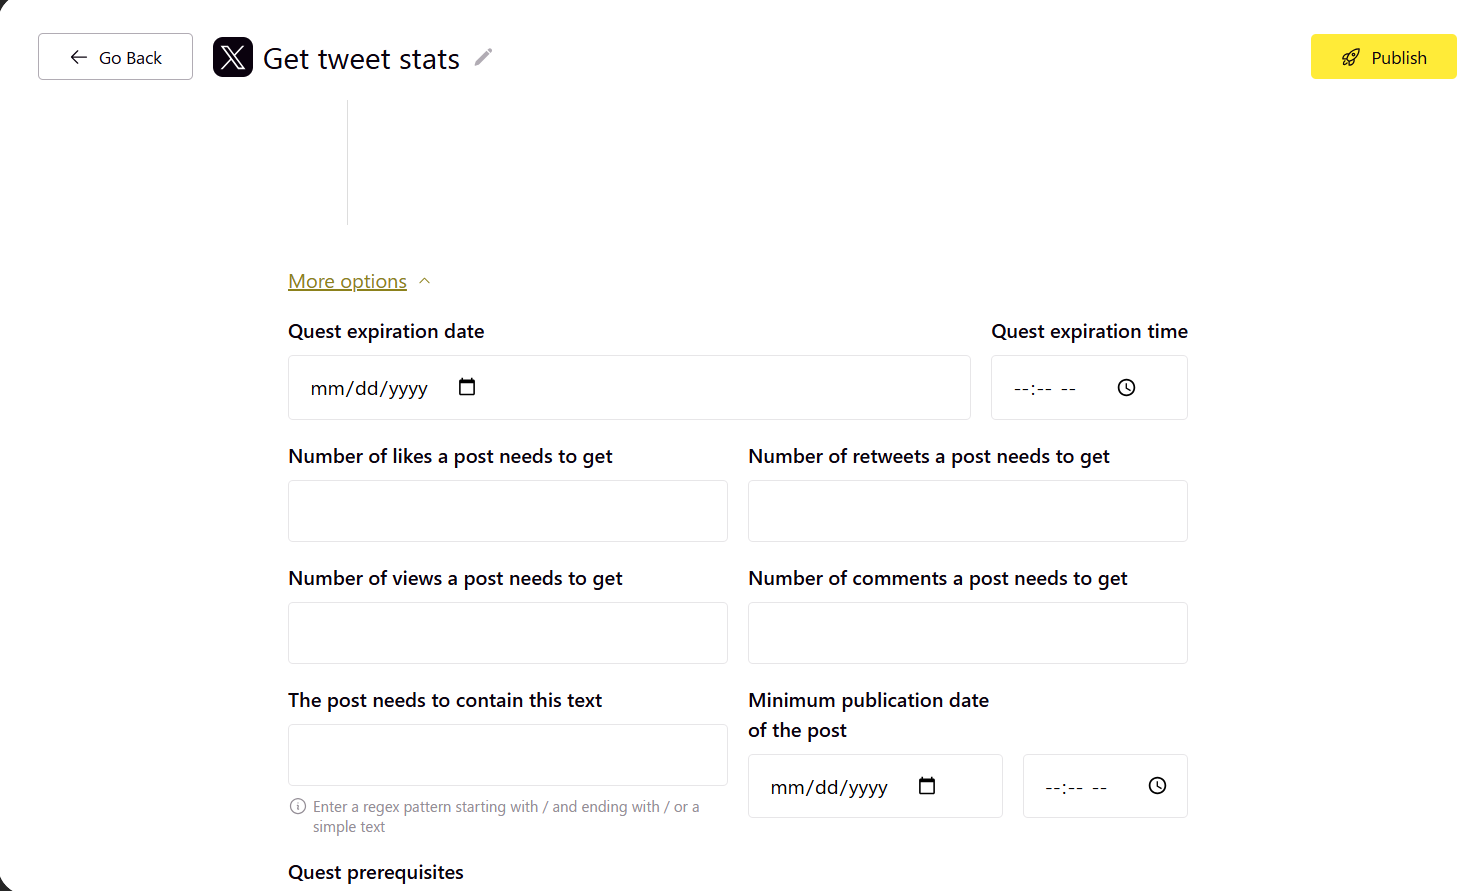
6. (Optional) Click on "More Options"
Here you can go deeper and customize advanced settings:
- Expiration date for the quest
- Minimum publication date (for video quests)
- Required keywords in the video or content
- Quest Prerequisites: Require the user to complete another quest first.
- Quest Periodicity: Daily, weekly, monthly, etc.
- Quest Completion Limit: Limit how many times a user can complete it.
Important Note
Once a quest is completed at least once, it becomes locked.
You can’t edit it anymore — you can only close it.
This protects users from changes after they've already done the task.